PVC mast construction

To get the 10m Moxon up in the air, I decided I was going to build a mast. My primary criteria for a mast was being able to lower it easily in case stormy weather rolled through. For now I’m not all that concerned about it being a permanent type installation yet. That will probably come later.

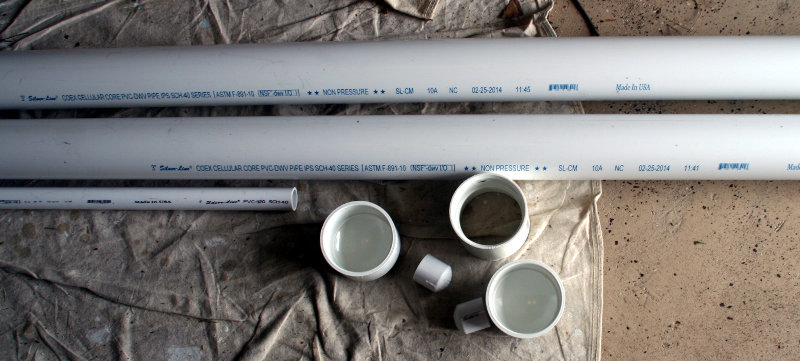
With that in mind, I decided to build the mast using PVC pipe. Off to Lowe’s I went to pick up a couple of 3″ by 10′ sections of PVC, a 1″ by 5′ section that the antenna will mount to, a coupler to join the 3″ sections with and caps for the ends of the pipes.

PVC pipes
PVC pipes

My original thought was to put the 1″ pipe on top with a reducing coupler, but I couldn’t find any 3″ to 1″ reducers in my earlier scouting trips. After looking around the garage to see what parts I had on hand, I decided to use some 4.5″ bolts and wing nuts to secure the 1″ pipe to the 3″ pipe.

1
1″ PVC bolted to 3″ PVC

Drilled three holes, but then discovered the lowest hole was too far down the pipe for me to reach. Fortunately it seems secure enough with just the two bolts.

With this I’ll be able to get the Moxon up between 20-23′ up in the air, and maybe even have enough room for another antenna on there too. Getting the whole thing vertical proved to be more challenging than I expected. I think I’m going to need a ladder to get it vertical.

10m Moxon on the mast

It definitely needs guy lines so getting those positioned will be the next step. For now everything is back in the garage waiting for my next free afternoon.

So long and thanks for the Etherkit

In a bit of sad news, Jason/NT7S has announced that he’s leaving the radio kitting business and putting Etherkit on extended hiatus.

I thoroughly enjoyed putting together the Etherkit kits I purchased, especially the beta version of his CC1. It was my first big kit project, and one of the first using SMT components. It was an educational experience from both the assembly and learning about the different sections that go into a radio. Assembling the CRX1 and OpenBeacon were both equally enjoyable and educational.

Jason’s reduced the price on his very excellent CRX1 kit to liquidate his inventory. If you’re looking for a nice little CW receiver to play with and want to exercise your soldering skills with SMT components, pick one up.

I’m sad to see Etherkit go dark, but I’m sure running a kitting business is a lot of work and time. Hopefully some time in the future he’ll be able to bring it back.

CQ WPX 2014

Spent a few hours playing in the CQ WPX 2014 contest. Had a few other things going on this weekend so I didn’t spend a whole lot of time playing radio. Most of my radio playing was on the last day of the contest. I think I put in a total of about 4 or 5 hours in the chair and got 77 contacts, pretty much all on 10m. Went down to some of the lower bands just to see what I could hear. Found a few other contesters, but it wasn’t quite as busy as I expected. Compared to last year, my QSO rate was higher, but fewer contacts.

One big highlight was working a VK4 station (VK4KW) on 10m SSB which I was kind of surprised to hear, and even more surprised when I actually got him.

This is how I finished up the contest.

 Band    QSOs    Pts  WPX
     7       4      4    4
    14       2      6    1
    21       5      11    4
    28      66     181   64
 Total      77     202   73
Score: 14,746

Nothing spectacular, but I think it’s decent enough.

Call sign history – AB4UG

Inspired by Alan/W2AEW’s most recent video, Ham Radio call sign history, and my QSL card quest and some Twitter posts by W5RST and W0EA, I thought I’d dig into the past of my current call sign, AB4UG. I don’t expect it to be as interesting or storied as some other call signs, but it will be interesting to see what I can find out.

I knew AB4UG had been used previously by someone else because of looking it up in the AE7Q database as well as the FCC ULS database. Both list only one previous user for AB4UG from KY, issued 1990-03-13 and expired in 2000-03-13. The AE7Q database suggests a pre-ULS history, but no further details.

A Google search for AB4UG shows mostly my stuff or references to me, but then a couple pages down is a page listing some SK’s (silent keys) for the Southern Ohio Amateur Radio Association where the previous AB4UG is listed.

KH6TY Sound card interface v0.3

Finally took the plunge and reworked the sound card interface. I wanted to make it a little more compact and try to put it into an enclosure.

v0.2 was built on another section of perfboard, but I messed it up and decided to build v0.3 on a piece of half sized Perma-Protoboard.

KH6TY sound card interface v0.3

v0.3 currently half works. Getting sound through from the radio to the laptop seems to be working fine. Getting sound out from the laptop through to the radio doesn’t seem to be working that well though. Seems like there’s not enough voltage into the 2n4711 transistor to make the collector close the PTT line and make the radio transmit. Kind of wondering if I grabbed the wrong diodes that go before the transistor. I also seem to be getting some voltage loss in the 3.5mm connectors. Given how much they’ve been soldered and unsoldered, I should probably find new ones to replace them with.

Still some more hardware debugging to do on this latest iteration.

Update: Electronic devices are weird sometimes. You test them out and they don’t work. Leave them alone for a while, and then they start working. Not sure what it was I did in the sound card settings or in fldigi, but the interface seems to be working now (at least it triggers the PTT when I put fldigi into transmit mode). Now to see if I can actually make a QSO with it.

Update: Successfully made two contacts with the interface! First one was PSK31 with an op in Belgium on 20m and the second one was the W1AW/7 portable station in Idaho on 20m RTTY. Yay!

Instead of mounting it inside a tin, I mounted the board onto another piece of 1×4 lumber with some rubber shelf liner glued to it. It’s kind of neat to see it next to the laptop and imagine the currents flowing around in the circuit while I play.