It took a little bit of work and puzzling out wires, but I managed to get the microphone (temporarily) wired up to the radio. In the process, I learned a few things.
- If you look up the pin numbering for the RJ45 connector (apparently the corrent term is 8P8C), most diagrams have pin 1 on the left side and pin 8 on the right side.
- Kenwood numbers the modular connector used for the microphone on the TS-480SAT with pin 1 on the right side and pin 8 on the left side.
- The white and green wires in the Astatic 877L are connected to the PTT switch, but not to anything else. Posts on internet forums say that with Astatic microphones, the white wire is usually the MIC AUDIO line. In the case of this microphone, that’s not true. The only wires that count are the red, black and ground/shield wires.
- Ignore the Internet and stick to the microphone wiring label.
I had a short piece of CAT6 ethernet cable on hand, so I cut that in two pieces, stripped the ends and used some jumper wires to connect the microphone to the appropriate wires on the ethernet cable.
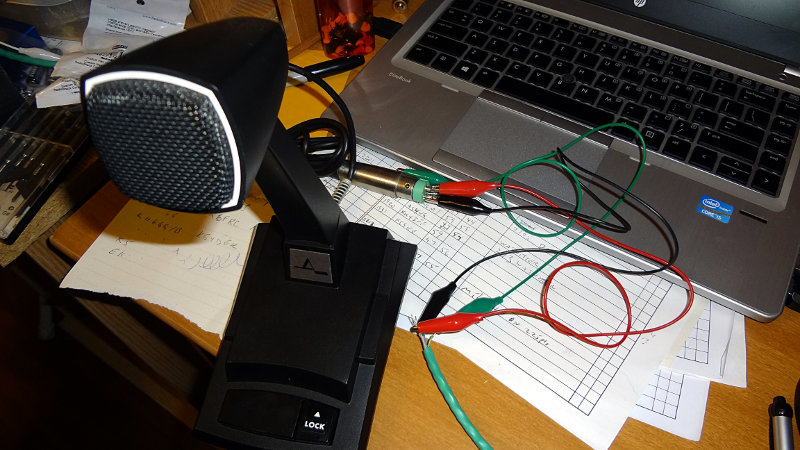
| Microphone wire | CAT 6 wire | Function | Pin (Kenwood) | Pin (RJ45) |
| Shield | Green/white stripe | GND | 3 | 6 |
| Black | Blue/white stripe | MIC GND | 5 | 4 |
| Red | White/blue stripe | PTT | 4 | 5 |
| Red | White/green stripe | MIC | 6 | 3 |
Wired up like this, the microphone seems to work. With TX monitoring on the radio turned on, I can hear myself pretty nicely through the speaker. The meters on the radio move when I talk. I wasn’t able to make any contacts on the radio to get any kind of signal report though.
With only three connections to make, it should be pretty simple to replace the existing microphone cord with my length of CAT6 cable. The only thing I don’t like about this wiring scheme is that it puts mic audio on the radio’s PTT line. Although the radio didn’t seem to protest during my testing, I’m not sure that’s a good thing.
I think I’ll test out this alternative wiring as well
| Microphone wire | CAT6 wire | Function | Pin (Kenwood) | Pin (RJ45) |
| Shield/Green (F) | Green/white stripe | GND | 3 | 6 |
| White (E) | White/blue stripe | PTT | 4 | 5 |
| Black (A) | Blue/white stripe | MIC GND | 5 | 4 |
| Red (C) | White/green stripe | MIC | 6 | 3 |
This will separate the mic audio and the PTT lines which, from the radio’s perspective, seems to make more sense.
I wonder if I’ve got a rocker switch in the junk box that I could connect the UP/DOWN lines to. I think there’s enough room in the mic base where I could make an opening and add it in.
Discover more from AB4UG Radioblog
Subscribe to get the latest posts sent to your email.